What am I trying to do and why?
This post is about replacing Google Photos with something I own and control. I like the experience, but the free tier is too small and I do not want to keep paying for more storage. Google gives you only 15 GB for free, and iCloud is even worse at 5 GB. Amazon Photos offers unlimited photos storage and comes with a Prime subscription, but it only has limited video uploads of 5 GB.
Those tradeoffs pushed me toward a setup that feels like Google Photos, runs on my home server, and is still reachable when I am away. Immich gives me the product, and Tailscale gives me secure access without opening ports to the public internet.
Why this setup
I wanted a self-hosted photo library that feels modern, works flawlessly, and stays secure from anywhere. The combo of Immich and Tailscale delivers that with minimal friction.
What Immich is for
Immich is an open-source, self-hosted alternative to Google Photos. It handles photo uploads from your phone, organizes everything into a timeline, and gives you albums and search without handing your library to a third party. For me, Immich is where all my photos will live going forward.
This is what Immich looks like. It should feel familiar if you use Google Photos, just self-hosted.
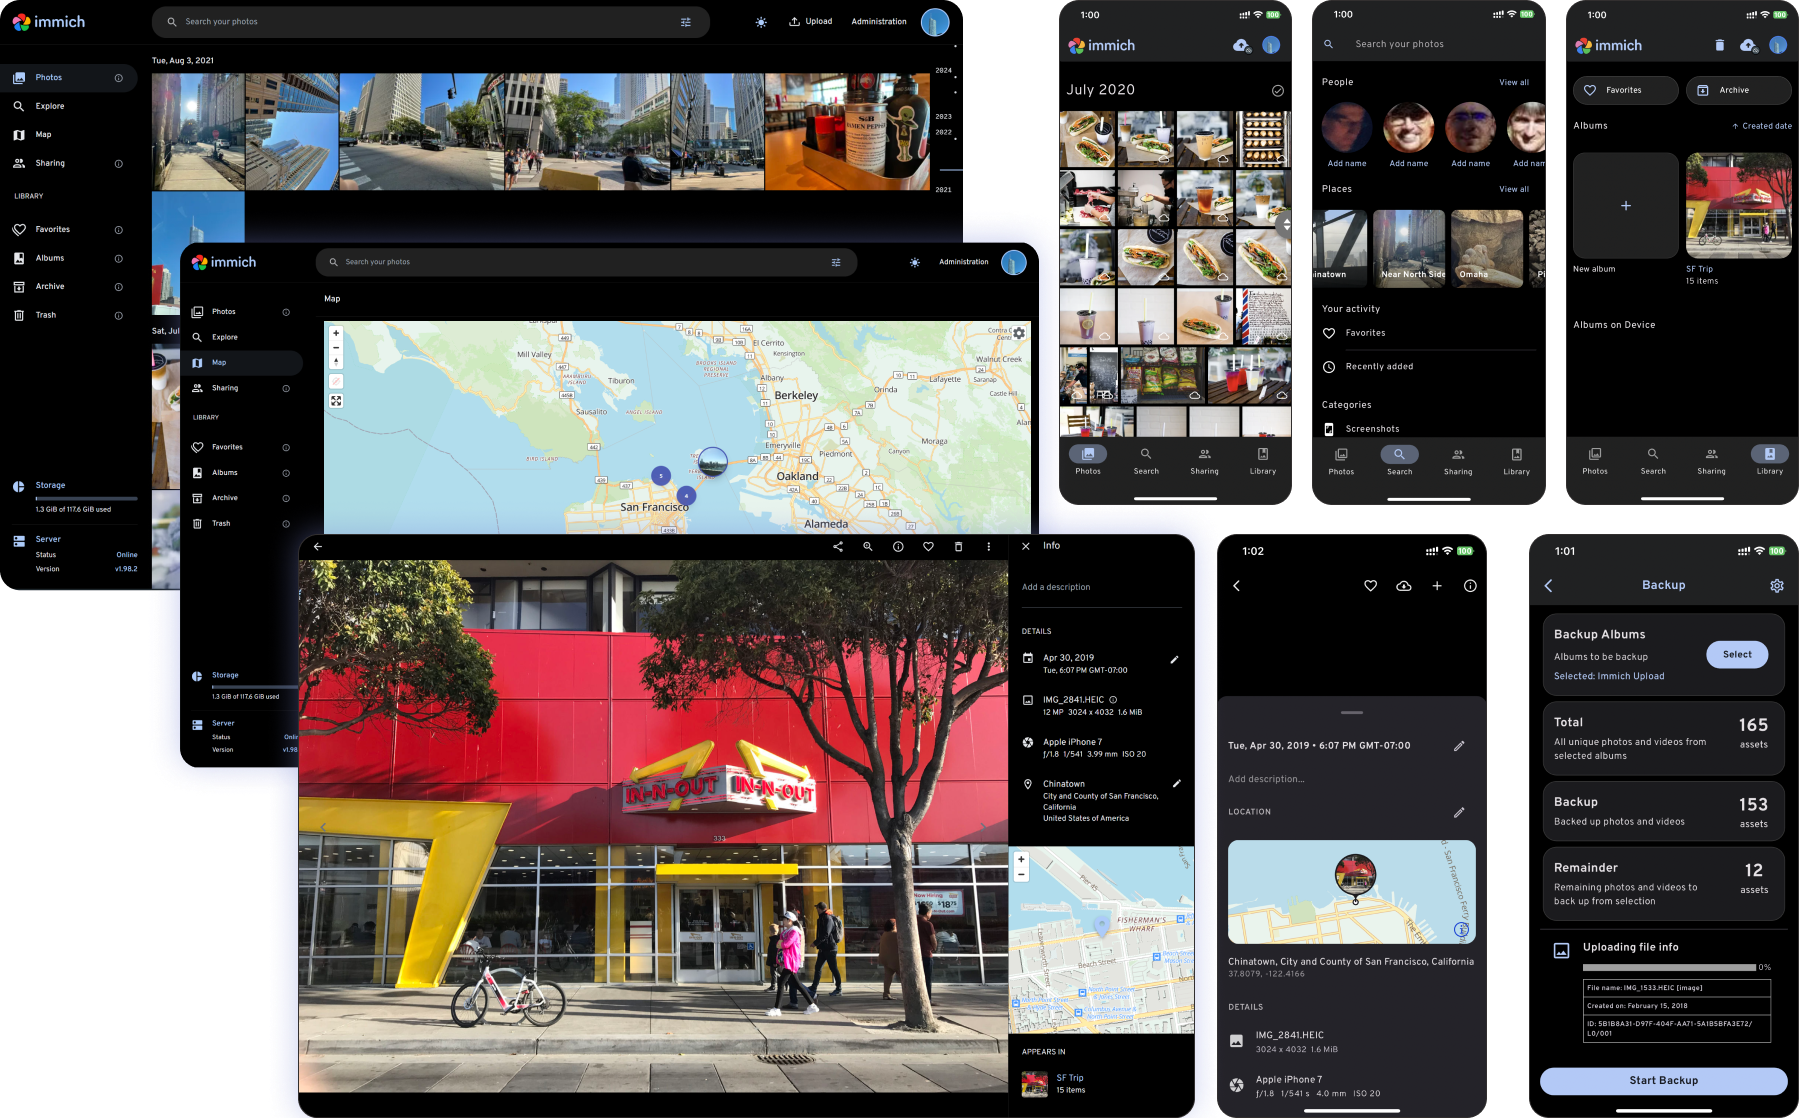
Immich web UI showing the timeline and albums.
Basic Immich setup
I will not bore you with every installation detail since it is a couple of commands. Here is the short version I followed, and the official docs are worth skimming for updates.
-
To run immich, you will need to have Docker installed.
-
Download the Immich
docker-compose.ymland.envfiles. -
Set your photo storage location in the environment file.
-
Start the containers.
mkdir immich && cd immich
wget -O docker-compose.yml https://github.com/immich-app/immich/releases/latest/download/docker-compose.yml
wget -O .env https://github.com/immich-app/immich/releases/latest/download/example.env
# Edit .env to set UPLOADS_PATH to your desired photo storage location
docker compose up -d
What Tailscale is for
Tailscale is for secure remote access. It creates a private network between my devices so I can reach Immich from my phone or laptop when I am away from home. It runs on top of WireGuard, handles device authentication, and keeps traffic encrypted without me touching port forwarding.
If you are new to it, the flow is simple: install Tailscale on the server and your devices, authenticate, and then use the Tailnet IP or MagicDNS hostname to reach Immich.
Tailscale is excellent, and the free tier is surprisingly generous.
High-level setup
Here is the simple version of what I did:
-
My home server runs Docker and hosts the Immich containers.
-
Photos are stored on the server.
-
Tailscale runs on the server and on my personal devices allowing me to securely and seamlessly access Immich from anywhere.
[Phone/Laptop] --(Tailscale)--> [Home Server: Immich]
Access path from devices to Immich storage.
My setup details
Use this as a reference and swap in your exact specs:
-
Hardware: Beelink (Ryzen 6500U/32GB RAM/1TB SSD)
-
OS: WSL2 on Windows (I know I should move to Linux someday, but this works for now)
-
Storage layout: Immich uploads on docker volume mapped to my storage path.
Trade-offs vs Google Photos
-
You own updates, backups, and uptime.
-
Remote access is on you (Tailscale makes this easy).
-
The upside is full control and predictable costs.
Backups (do not skip this)
Immich stores photos on disk and metadata in a database, so I plan to back up both:
-
The photo storage directory (files).
-
The database volume (so search, albums, and metadata are preserved).
A simple starting point is a nightly sync to an external disk plus a weekly copy to an object store like S3 Glacier Deep Archive. Just make sure the database and uploads are backed up consistently.
What I want to improve next
This is the first step, not the final step. My next priorities are automated backups, monitoring, and a clear recovery runbook.
If you are also building a home server, this setup is a great way to make it feel instantly useful. I will keep iterating as I go.